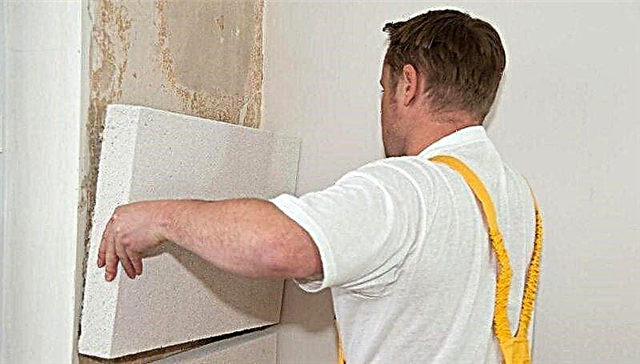
High-quality decoration of the slopes after installing the window construction is an important stage in the final work, the aesthetics of the house on the inside and outside depends on the result. We will tell about how to plaster the slopes on the windows and do the work at the proper level below.
The advantages of the plaster method
Plastering window slopes does not lose its relevance, along with traditional methods that involve the use of panels made of plastic, wood or drywall. Knowing how to make slopes, you can save a lot on construction work. The method has a number of significant advantages:
- low price of the material;
- strength and stability;
- long term of operation.
Plastering window slopes with your own hands is another big plus of the method, which allows even a novice to cope with the work, since the technology is simple to execute. In addition to the advantages, it is worth mentioning the disadvantages of plastering:
- average thermal insulation;
- risk of mold and moisture;
- the appearance of cracks with time.
The method is suitable for houses where both wooden windows and plastic double-glazed windows are installed.
Mortar for plaster
The plastering of the external slopes and internal is carried out independently made with mixtures or ready-made store options. It is advisable to purchase already prepared options, where the correct proportions are observed and there is no need to measure the number of components for the mixture made.
Plaster on the slopes of their own preparation will require the presence of binders in the composition, which often act: clay, cement or gypsum filler. Depending on the number of components, the solution may be simple or complex in composition. It is very important to add the exact amount of components to obtain a high-quality mixture, otherwise the solution may turn out to be oily and crack quickly after drying. An excessively meager composition also will not bring anything good: it will turn out to be fragile, as a result of which it will be necessary to repair the slopes after installation.
In order not to make a mistake in the consistency of the future mixture, be guided by the following signs:
- a well-mixed composition will slightly cling to the scapula;
- poorly mixed (bold) will cling strongly;
- the lean mixture does not exhibit adhesion at all.
For the manufacture of the mixture, you can use slaked lime, which in the right proportions is ideally suited for wooden and stone foundations. You can only use the slaked version, otherwise the surface may be swollen. You can buy the component at a hardware store. You can independently extinguish lime in this way:
- Pour the quicklime lime into a container of the right size and fill it with water so that the lime is completely covered with liquid. Active vapor release begins within a few minutes, after which we add a little more water and mix thoroughly.
- Medium quench lime is poured in an amount of ¼ from the tank and poured with water to half the volume. Vapors begin to be released after 30 minutes, at the end we dilute with water and mix.
- Slow quenching lime is not poured with water, but only moistened. The blanking process lasts more than 60 minutes.
You can also use gypsum, but you should take into account the speed of work, since the mixture with this substance dries out within 5-10 minutes. It is important to consider that gypsum mortar is unstable to a humid environment, so it is advisable to use it for interior work in dry rooms.One of the strongest materials is cement, which adheres to the surface for 15 minutes and completely dries in a day.
Choosing how to plaster the slopes on the windows indoors and on the outside, pay attention to the strength properties of the component components so that the slopes last for a long time.
Prepare the work surface
How to plaster the slopes on the windows and get an excellent result depends on good surface preparation. A small violation of an important stage will be the main cause of cracked or fallen plaster. So:
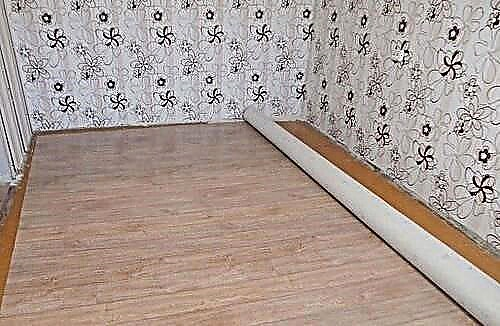
- The beauty and accuracy of plastering will require leveling the surface of the slopes of the windows from the outside and from the inside. The vertical slopes according to building codes should not deviate more than 1-2 mm per 1 m. Inspect the evenness of each wall. Before plastering the window slopes, it is necessary to align the walls. Time and plaster consumption will increase, but it is better not to ignore the quality requirements in order to get a good result. If the surface is slightly curved, a wire mesh is suitable for leveling.
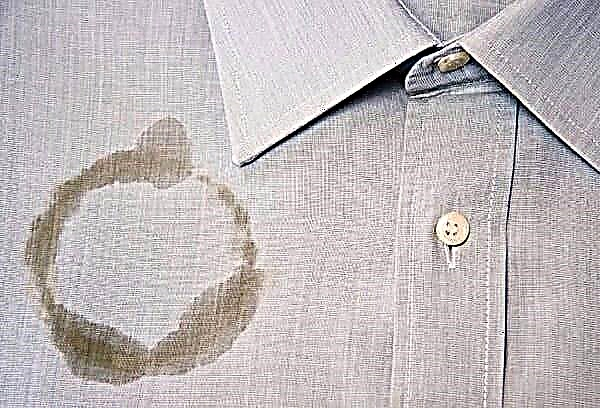
- The surface is cleaned of traces of dirt and dust to improve the adhesion properties of the mortar with the plastering places. Brick or concrete walls are cleaned with a 3% hydrochloric acid solution and washed with cold water. To get rid of oil stains, you can apply greasy clay. It must be applied to the desired areas and allowed to dry well, then remove. If necessary, the procedure can be repeated.
- Plaster mixes on a window opening put after removal of the previous layers. External slopes and internal slopes need to be tapped so that poorly fixed particles of the old mixture fall out. The resulting cracks are cleaned, dirt and greasy spots are removed. Areas with broken plaster are moistened with water and smeared with a new solution. As it dries, a new mortar can be applied to the plastered area, distributing it already over the entire surface of the slopes.
To properly plaster the slopes on the windows with your own hands, take into service all the preparatory stages to achieve high quality work. To accurately level the surface, use building beacons or a stucco profile. Visually flat walls can play a cruel joke at the end of all work, so be sure to set the guides along which the surface will be leveled. Lighthouses will serve as a guarantee as a leveling element, the use of which will avoid future alterations and additional costs.
Stucco Tools
The main points about how to plaster the slopes on the windows have already been announced and it's time to talk about the devices. In order to achieve excellent results, you can not do without a set of tools and related equipment. In the work you will need:
- laser level to set the profile (beacons);
- foam, if the window slots are poorly sealed during installation;
- construction goat or small step-ladder;
- thick rubber gloves for protection against solutions;
- grater and grater for cement mortar;
- silicone sealant and sharp knife;
- black pencil, tape measure;
- spatula and trowel.
Next, we talk about how to make slopes on stucco windows.
Let's move on to practice
Do-it-yourself plastering window slopes from the inside. First make the bottom and sides, then go to the upper slope.
- Part of the solution needs to be diluted thinner and distributed over the window opening areas. This step will contribute to a good adhesion of the surface to the plaster. The mixture is taken with a spatula and laid out on the openings. It is important that it does not spread, but sticks to the surface.
- Let the first layer dry.
- Set the angle profile using the level.
- We continue to lay the layers on the slopes, not forgetting to monitor the leveling of the surface.
- As the solution completely dries, you need to correct the corners.
- We grout with a grater.
- Apply a coat of primer.
- We turn to the finish, which may be decorative plaster or tile.
After installing plastic windows, the following items are added to standard technology:
- on a plastered slope with a spatula make a furrow of 5 mm;
- in a rut made, we lay a layer of silicone, which will not allow cracks to form in those places where the window is connected to the slope.
The rest of the plastering of the slopes of the plastic windows occurs according to the above technology. If gypsum mixture was used in the work, then at the final stage it is necessary to dismantle the elements of the window slats by bending.
Next, you can proceed to the plastering of the external slopes of the windows. Subject to the basic rules and knowledge of how to plaster the slopes on the windows, it is possible to significantly improve the thermal insulation in the house and give it a beautiful appearance.