With the onset of autumn and the first cold weather, all summer residents dig, cover or transfer flowering plants to warmth. When to dig out gladioli? How to save them until spring? Storage of gladioli after excavation is an important stage that affects their health and flowering in the coming year. Gladiolus is a heat-loving flower that does not respond well to cold and wind, so its bulbs need to be removed from the ground before the onset of frost.
Gladioli just dug up, photo:

Experienced gardeners recommend first digging out gladioli with dark shades of flowers. Violet, maroon, cherry, black, as well as blue varieties should be given attention first. The reason for this separation lies in the weak immunity of dark species, their inadequate protection against fungal diseases. Those representatives that were grown from onion children, on the contrary, are dug up last.
Beginning gardeners or just interested lovers often ask the question: do I need to dig out gladioli for the winter? The answer will be positive and not negotiable - yes, it is.
It is advisable to devote a sunny and dry day to this process, since digging up the bulbs after rain will be inconvenient (washing the seed, drying, etc.). As an auxiliary tool, it is better to choose ordinary garden pitchforks, the bush should be carefully pried from below and removed from the ground along with an earthen lump. You don’t need to pull the gladiolus by the stems or pull it like carrots or beets, as you can damage the tubers and lose the baby bulbs.
Dates when to dig out gladioli in the fall
For this event, middle-aged gardeners most often choose the end of September-beginning of October, and in the south this can be done later. According to popular belief, the first cold snap is a signal to dig out gladioli. If you miss this time, reach the first frost, the bulbs will inevitably die. A temperature of -1 ° C is sufficient to damage the planting material.
In any case, always take into account the individual weather conditions of your region. The popular "horticultural" sign says - dig up gladioli after harvesting potatoes, but have time to collect late cabbage.
In the Kuban, they start digging potatoes in July, and later cabbage is harvested in November. So southerners, rather, need to focus on the timing of harvesting cabbage.
There is still an important point - cleaning of gladioli in the fall should be carried out after at least a month has passed since the end of flowering. Approximately 30-35 days are required for the plant to form a substitute corm and tuber buds (onion bulbs). Thus, if your favorite gladiolus bloomed on August 5, then around September 5-8 you can start digging tubers. By the way, for the same reason, it is better to remove faded stems immediately (cut off from the bush) so that the plant does not spend extra forces and nutrients on already "used" material. After flowering, the gladiolus should accumulate its potential, direct it to the formation of a tuber, and not the ground part. If you did not cut the top on time, then the digging period should be extended by approximately three weeks.
Dug and washed bulbs, photo:

If for some reason the gladioli are cleaned for the winter a little earlier than the due date - in principle, there is nothing to worry about. If the tuber is not fully ripe, it will "reach" the desired condition during storage, but for onion children this situation is even favorable. Unripe children are tightly attached to the tuber, respectively - they are better removed from the soil, do not get lost during sampling, have a light gray tint (it is easier to notice in the ground). The matured baby has a brown color, it is easily separated from the bulb, but it can not be seen in the ground and "lost" when digging.
In which cases it is recommended to dig out gladioli for the winter ahead of schedule. Do I need to do this
Sometimes the summer is too rainy or the owner did not keep track of the flower garden, because of this (due to excess moisture) brown traces may appear on the leaves of the plant. These spots are Botritis gray fungus, sometimes called “gray clay”. To save the tubers and save the seed, the bulbs are dug up ahead of time. After that, gladioli should undergo appropriate processing. But this will be discussed later.
Gladioli - how to dig them out and how to store?
A more detailed description of the process is as follows: we calculate approximately 10-15 cm from the center of the proposed location for the bulb, carefully immerse the forks in the soil and, as it were, dig the bush in a circle, then press the handle of the forks and extract the root of the plant (corm) along with the ground. Next, select tubers and children, put them in a suitable container. By the way, for these purposes, you can also use two garden scoops, they are very convenient to work with two hands, the process is better controlled, faster.
Bulbs with children, photo:

Harvesting gladioli for the winter necessarily provides for radical trimming of the remaining fragments of the terrestrial part of the plant. Stems should be cut as close to the bulb as possible.
Stalk pruning, photo:

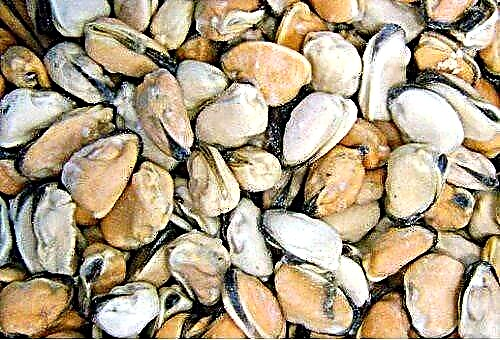
Next, you need to separate the new tuber from the mother. But this action is best done after drying, when about 20 days pass. After these manipulations, the seed should be washed. In a construction sieve, it is most convenient to do this under running water. Bulb processing (pickling) is the next, no less critical stage of preparation for wintering.
How to treat gladioli before storage? The biggest “fan” of gladioli is thrips, so that it does not remind of itself, while the tubers are waiting for the new sowing season, stock up on “Karbofos” in advance. Make a 15-minute bath for the bulbs from the solution of this preparation, then immerse in potassium permanganate (water weakly pink solution) for about 10 minutes. Instead of Karbofos, you can use a remedy with a similar action - Decis, Fitoverm, Inta-Vir. After processing, the tubers do not need to be rinsed with water, but immediately sent to dry.
Storage of gladioli after excavation is a responsible process that requires constant monitoring, and sometimes reinsurance. For your own reassurance and confidence, you can carry out a control, re-dressing of tubers after 5 days after the first treatment. This procedure is not mandatory, but the cases are different, as they say - it’s better to “overdo it, than not overdo it”. In this case, the bulbs are immersed in a solution of the fungicide "Maxim" (4 ml / 2 l of water) or "Fundazole" for 30 minutes. This procedure prevents the appearance of fungi, helps prevent such a dangerous disease as fusarium.
In the room where the bulbs will dry, it should be warm (about +25 .. + 30 ° C), storing gladioli after digging (first period) takes about three weeks. Seed should be laid out in a single layer in cardboard boxes or wooden trays. At the end of the specified period, it is necessary to carry out a control inspection of the tubers, discard specimens in doubt, remove the scales and the remaining fragments of the roots.
If suddenly you find traces of rot, then if they are insignificant, cut off the affected areas with a sharp knife and disinfect the cut site. For these purposes, an ordinary greens, a solution of potassium permanganate or well-proven fungicides (Vitaros, Maxim) are suitable.
Hulling is an additional safety feature against thrips that can hide their eggs in it.

This is followed by the second storage stage, in which the tubers are transferred to a dry room with a lower temperature (cellar, garage, shed). Bulbs of gladioli are stored in any way convenient for you - the main thing is that everything is in accordance with the rules.
In addition to wooden or cardboard boxes, you can use the old and reliable "grandmother" storage method - a dense nylon stocking, in which tubers are placed, and then hung from the ceiling or shelves in the cellar. It is important from time to time to periodically inspect the tubers, in case of any suspicion, to remove defective specimens. It’s best to stop any disease at the initial stage than then save the remaining seed, spend time and effort. In order not to confuse the varieties, it is better to sign or mark containers for storage.
Storage of gladioli in a city apartment
Cellars, cellars, garages are excellent places for wintering tubers, but what about gardeners who live in the apartment? To help them come wooden or plastic trays with wide ventilation openings and cardboard boxes from shoes. Each tuber is better wrapped in natural cotton cloth or newspaper, toilet paper, by the way, is also suitable. The most important thing is that in the storage place the temperature column should not exceed +5 .. + 10 ° C, otherwise the bulbs will begin to deteriorate or sprout.
Winter storage of gladioli in plastic bags or solid plastic trays is unacceptable - this is a taboo. Under such conditions, seed will inevitably deteriorate.
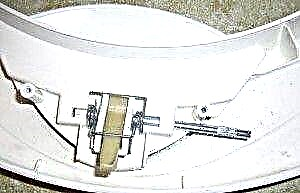
Suitable plastic storage container, photo:

Each of us has a refrigerator at home, and the refrigerator has a compartment for storing vegetables, where the temperature is always higher than in other compartments. This place is well suited for gladiolus tubers. A box located on the windowsill can also become a storage, but the temperature in this zone must be appropriate so that the tubers do not “wake up” ahead of time. Make sure that the bulbs do not come in contact with the glass, so they can freeze and soften. Remember that storing bulbs of gladioli implies their monthly inspection, regardless of the place of wintering.
A little tip - add garlic cloves into a bowl of tubers, cut into 2 or 3 pieces. Its phytoncides are detrimental to various fungi and microbes, disinfect the air.
Some experienced gardeners advise sprinkling tubers with dried mint. In fact, this is a very effective, albeit not common, method with which you can stop the germination of bulbs. Essential oils of a plant contribute to the inhibition of this process.
I also want to focus on an even rarer method of storing valuable tubers - waxing. In a microwave or in a water bath, paraffin is heated, each tuber is dipped in a warm mass, the scales must be previously removed. When the time comes for planting, such bulbs are buried in the soil directly in the paraffin shell.
Knowing when to dig out gladioli, how to do it right, and how and where to store bulbs of gladioli in winter is a guarantee of future lush flowering in summer, worthy decoration of your site, as well as aesthetic pleasure from contemplation of bright beauty.